
TL;DR
Moving noise out of your workspace is the most effective way to reduce sound issues, especially with a closet setup. Strategic placement, sealing gaps, and using the right materials make a huge difference—foam alone won’t cut it. Good ventilation is key if you put a rig in a closet or cabinet.
Ever tried recording in a closet? It’s a common hack, but it comes with surprises. You might think stuffing foam on the walls is enough, but the real game-changer is where you place your microphone and how you manage the space around it.
This guide cuts through the noise—literally—and shows you how simple tweaks can turn a cramped closet into a clean, professional-sounding voice booth. Whether you’re streaming, podcasting, or just want clearer recordings, understanding the nuts and bolts of dampening and placement saves you time, money, and frustration.
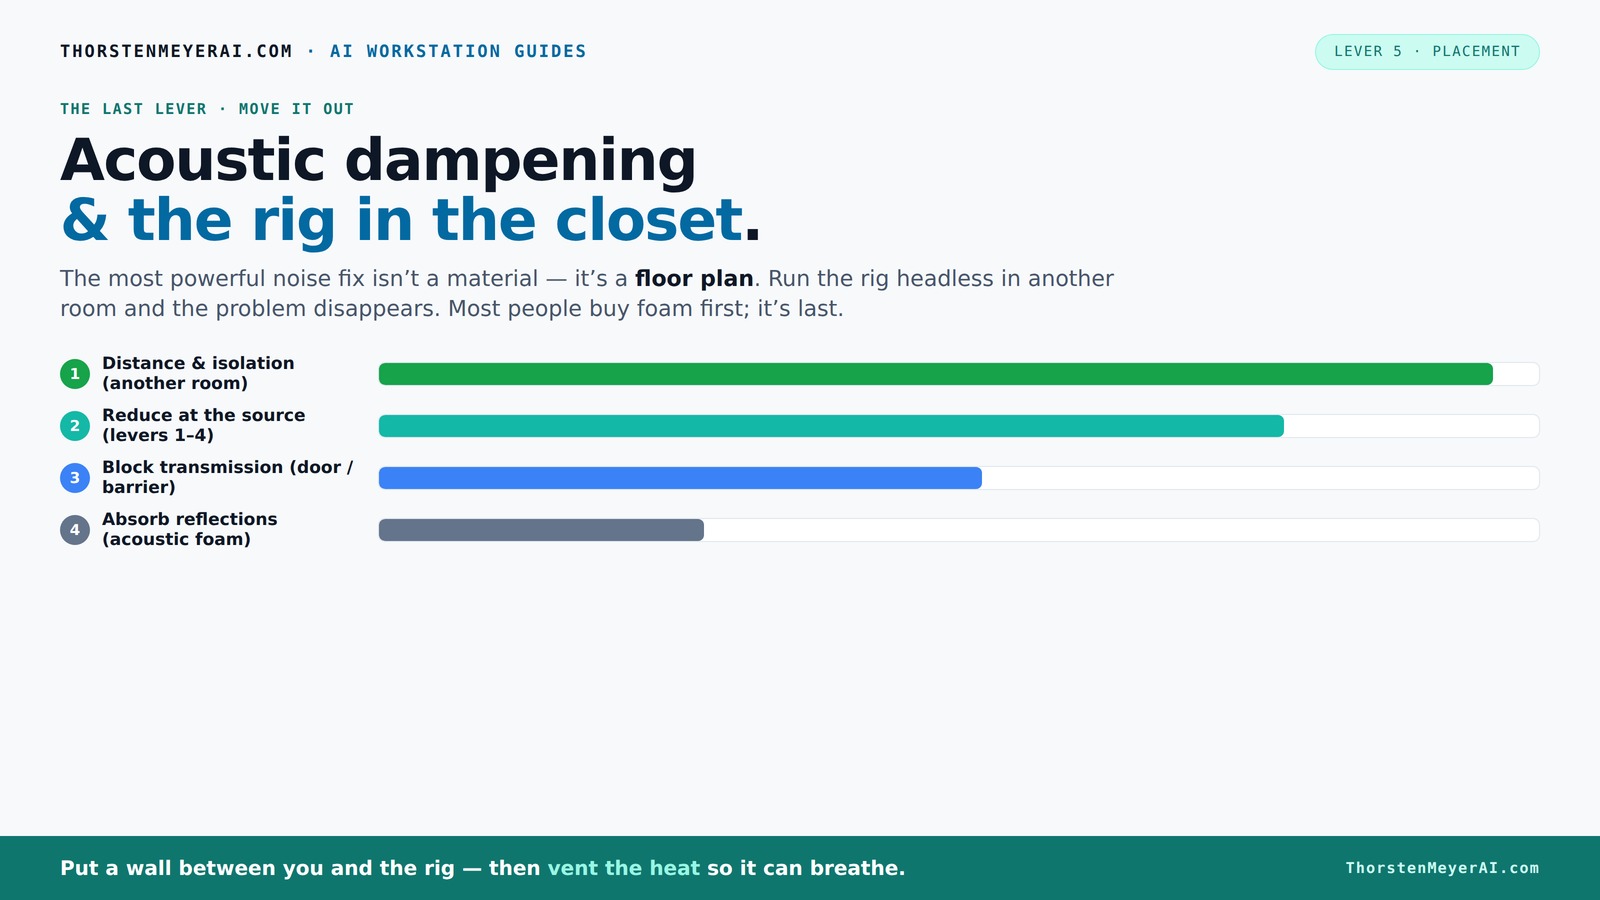
Acoustic dampening
& the rig in the closet.
The most powerful noise fix isn’t a material — it’s a floor plan. A rig you can’t hear because it’s in another room beats any amount of foam. Tap the approaches in Part 1 to see what actually works.
(another room)
(levers 1–4)
(door / barrier)
(acoustic foam)
Contain the noise, not the heat
Key Takeaways
- Moving your rig to another room or closet is the simplest way to cut noise dramatically.
- Prioritize treating the main reflection points—behind the mic, side walls, and ceiling—before over-treating corners.
- Seal gaps around doors and vents to prevent sound leaks and external noise intrusion.
- Use household items like blankets and rugs as quick, cheap dampening solutions.
- Always consider ventilation when placing a hot rig in an enclosed space—overheating defeats the purpose.

Focusound 52 Pack Acoustic Foam Panels 1" x 12" x 12" Sound Proof Foam Panles Soundproofing Noise Cancelling Wedge Panels for Home Office Recoding Studio with 300PCS Double-Side Adhesive
Soundproofing - Acoustic foam panels triangular grooves structure for better noise absorption, helps to reduce and absorb unwanted...
As an affiliate, we earn on qualifying purchases.
As an affiliate, we earn on qualifying purchases.
Why Moving Your Rig Is the Easiest Fix for Quiet Sound
The best way to cut noise is to put distance between your ears and the source. A rig in another room? Nearly silent on your end. When you access it over a network, the noise becomes invisible to you. Learn more about maintaining and servicing Ford Transit vans for setups involving dedicated spaces.
Imagine a quiet, dedicated space where your GPU hums away, undisturbed by your microphone or voice. This isn’t just theory—many professionals use closet or basement setups precisely for this reason. All you need is a good network connection and proper ventilation.

Studio Recording Microphone Isolation Shield with Pop Filter and Metal Tripod Stand, Studio Mic to PC Laptop Smartphone, Music Microphone for Recording Singing Podcasting
PLUG AND PLAY STUDIO MICROPHONE: This music mic does not require additional drivers, plug and play, and it’s...
As an affiliate, we earn on qualifying purchases.
As an affiliate, we earn on qualifying purchases.
The 'Rig in the Closet' Setup — Pros, Cons, and How to Do It Right
Placing your powerful, heat-generating rig in a closet can be a game-changer. The sound is contained, and the noise won’t bother anyone. But there’s a catch: heat builds up fast. For tips on proper ventilation, see acoustic dampening and ventilation setup.
To make this work, you need active ventilation—like a quiet exhaust fan or ducted airflow. Sealing gaps around doors with weatherstripping or acoustic sealant is crucial. Otherwise, sound leaks, and heat gets trapped, risking overheating.
For example, a friend built a custom closet enclosure with a small exhaust fan and thick acoustic panels lining the inside. The result? A whisper-quiet setup that keeps cool, with only a 2-3 dB noise level in the room.

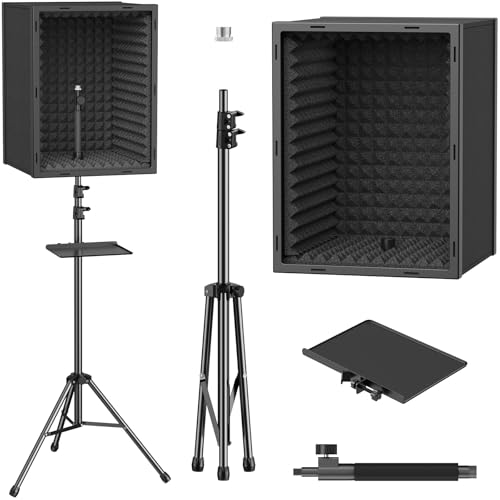
TroyStudio Portable Vocal Booth, Large Foldable Microphone Isolation Shield, Music Recording Studio Sound Echo Absorbing Box, Desk & Stand Use Reflection Filter with Thickened Dense Acoustic Foam
【BASIC INFO】: Inside size after setup: 8'' (L) X 10'' (W) X 12'' (H), large space for various...
As an affiliate, we earn on qualifying purchases.
As an affiliate, we earn on qualifying purchases.
Acoustic Dampening in Tight Spaces: Where to Focus First
Acoustic dampening isn’t about covering every surface—it's about targeting the biggest reflection points. In a closet, the main focus should be behind the mic and directly in front of it.
Imagine your microphone as a spotlight. The wall behind it reflects your voice back into the capsule, muddying clarity. Placing a panel or blanket there can make a dramatic difference because this is where sound waves bounce back directly into the mic, causing comb-filtering and muddiness. For effective treatment, see dampening in tight spaces.
Next, treat side walls at reflection points and the ceiling if it’s close. Floor bounce? A thick rug or carpet can absorb that. This targeted approach saves money and avoids the ‘boxy’ sound that comes from over-treating.
TONOR Microphone Isolation Shield, Professional Mic Shield for Studio with Tripod Stand, Adjustable Height Max 53.1 inch, Sound Proof Box for Singing, Recording Studio Equipment
Sound Absorption & Isolation: This vocal booth features a box design combining five high-density foam and sound absorbing...
As an affiliate, we earn on qualifying purchases.
As an affiliate, we earn on qualifying purchases.
Where Bass Traps Help (and When They Don't)
Bass traps are often misunderstood. In tiny, parallel-walled closets, low frequencies tend to pile up in the corners. These are the spots for bass traps, as they are designed to absorb energy at low frequencies that otherwise cause boomy or muddy recordings. Learn more about bass trap placement.
However, outside of these specific issues, bass traps are less effective for mid and high frequencies, which are usually the main culprits behind echo and reverb. If your recordings sound hollow or overly reverberant, focusing on treating the surfaces where sound reflects—like walls and ceiling—is often more beneficial. Bass traps are a valuable tool, but they should be considered part of a broader treatment plan. Overusing them in small spaces can even deaden the sound excessively, so balance is key.
Sealing Doors and Gaps: The Hidden Key to Privacy and Clarity
Gaps around your closet door can let sound leak out and noise in. Sealing these is simple but often overlooked. Weatherstripping, acoustic sealant, or even DIY door sweeps make a big difference. For more tips, see sealing gaps and acoustic treatment.
Imagine trying to record vocals in a room with a loose door—sound escapes, and external noise sneaks in. Seal it tight and suddenly your recordings are clearer, and your neighbors stay quiet. Properly sealed gaps prevent external noise from contaminating your recordings and keep your sound contained within the space, which is especially important if you're trying to avoid disturbing others or capturing external sounds.
For example, applying weatherstripping around the door frame reduced sound leakage by over 50%, according to a recent DIY project. It’s a low-cost, high-impact improvement that can dramatically improve your recording environment.
Budget-Friendly DIY Treatments for Small Closets
You don’t need fancy panels to tame your space. Thick moving blankets, rugs, and even mattress toppers can absorb reflections and reduce echo.
Picture hanging a couple of blankets on the walls or stacking rugs in the corners. These simple DIY solutions can cut reverb significantly without breaking the bank. They work by absorbing sound waves that bounce around the small space, preventing them from creating a muddled or echoey recording.
For instance, a streamer used a few thick blankets on the walls and a large rug on the floor—cost under $100 and made a noticeable difference in sound clarity. The tradeoff is that these materials are less durable and less tailored than professional treatments, but for many, they offer a practical, immediate improvement.
Common Mistakes That Sabotage Your Closet Studio
Many DIYers overdo foam or treat every surface, which can make the space sound dead or boxy. While some absorption is beneficial, excessive coverage can strip away natural reverberation, resulting in an unnatural and dull sound. It’s essential to strike a balance that maintains some liveliness without causing echoes or dead spots.
Ignoring gaps around doors and windows is another common slip-up. Even the best treatments won't work if external noise leaks in or your sound escapes. Properly sealing these gaps is often more effective than over-treating the interior surfaces.
Failing to address first reflection points—such as behind the mic and the side walls—means missing out on the most impactful improvements. Treating corners without first managing these reflections can lead to wasted effort, as the main issues remain unaddressed. A balanced approach that considers both reflection control and leakage prevention yields the best results.
Frequently Asked Questions
What is the difference between acoustic dampening, treatment, and soundproofing?
Acoustic dampening reduces reflections and echoes within a space, making it sound clearer. Acoustic treatment involves placing panels or diffusers to control sound behavior, shaping how sound waves interact within the room. Soundproofing, on the other hand, aims to prevent sound from entering or leaving the space by adding mass, barriers, or sealing gaps. In small closets, treatment is often more practical and achievable than full soundproofing, which usually requires structural modifications.
Where should I put acoustic panels in a closet vocal booth?
The most effective placement is at the primary reflection points—behind the microphone and directly in front of it—since these areas are where sound bounces back into the mic and causes coloration. Side walls at reflection points help reduce flutter echo and comb-filtering effects. The ceiling can also be treated if it’s close enough to reflect sound downward. Corners are for bass traps if low-frequency buildup is evident, but focus first on treating the surfaces that influence the clarity of your vocals directly.
Do I need bass traps in a small closet?
Bass traps are particularly useful if your recordings sound boomy, muddy, or if you notice low-frequency resonance that colors your voice. In tiny, parallel-walled spaces, low frequencies tend to concentrate in the corners, so bass traps can help flatten this buildup. However, for general vocal clarity and reducing echo, addressing reflection points and sealing gaps often yields more noticeable improvements. Use bass traps selectively—only if you detect low-end issues—since overuse can deaden the space too much.
How much of the wall should I cover?
Target your main reflection points—behind the mic, side walls, and ceiling—with absorptive treatments. Covering approximately 20-30% of these key areas is usually sufficient to significantly improve sound quality without overly deadening the room. Avoid covering every surface, as this can lead to an unnatural, boxy sound. Think of it as strategic placement—focusing on the most reflective surfaces will give you the best return on your investment.
Is foam enough, or do I need blankets and thicker panels?
Foam panels are effective at reducing high-frequency reflections and controlling echo, but they do little to block sound leaks or low frequencies. Thick moving blankets, rugs, or mattress toppers absorb more sound energy across a broader spectrum and can help dampen reflections and prevent sound transmission. Combining foam with household items is often the most practical, cost-effective, and balanced approach—using foam for reflection control and blankets or rugs for absorption and leakage reduction.
Conclusion
The secret to a professional-sounding closet studio isn’t only about buying fancy foam or bass traps. It’s about where you place your gear, how well you seal gaps, and making sure your rig stays cool. A well-planned setup can turn even the smallest closet into a surprisingly effective voice booth.
Remember: your room’s layout and thoughtful placement matter more than the number of panels. Think of your space as a puzzle—fitting the right pieces together gives you the best sound. The quietest studio isn’t the one filled with foam; it’s the one where noise simply never leaves.