To avoid ruining bearings during testing, always use proper tools like a bearing puller or slide hammer with even, gentle pressure. Check the bearing’s condition before removal, ensuring correct alignment and applying the right lubricant to reduce resistance. Never force or impact the bearing, as it can cause damage. Maintain control and care throughout the process to preserve bearing integrity—more tips ahead will help you keep bearings safe during testing.
Key Takeaways
- Use proper bearing pullers and apply even, gentle pressure to prevent surface distortion.
- Apply penetrating oil and let it sit to loosen corrosion before removal.
- Ensure correct alignment during removal and reinstallation to avoid uneven wear.
- Avoid hammering or impact tools; rely on controlled pulling methods.
- Lubricate bearings adequately before testing to reduce friction and prevent damage.

Orion Motor Tech Bearing Puller Set, 5 Ton Capacity Bearing Separator, Pinion Wheel Bearing Removal Kit with 2" and 3" Jaws, Wheel Hub Axle Puller Set, Heavy Duty Bearing Splitter Tool Kit
1. VERSATILE BEARING PULLER: This Orion Motor Tech bearing puller set enables you to complete a wide range…
As an affiliate, we earn on qualifying purchases.
As an affiliate, we earn on qualifying purchases.
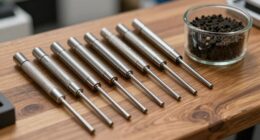
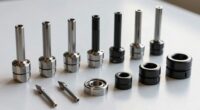
Tools Needed to Remove Carrier Bearings Safely
To remove carrier bearings safely, you’ll need a few essential tools. First, a bearing puller or slide hammer is vital for extracting the bearing without damaging surrounding components. A good set of hand tools, including sockets, wrenches, and screwdrivers, will help disassemble parts easily. Lubrication techniques play a key role; applying penetrating oil around the bearing can loosen corrosion and reduce friction. When handling bearing material, choose tools that won’t crush or deform the bearing, like a bearing separator or specialized puller. Wearing gloves and eye protection is also wise to prevent injury. Having these tools on hand guarantees a smooth removal process, minimizes risk of damaging the bearing or axle, and prepares you for proper installation or inspection later. Additionally, proper safety precautions should always be followed to ensure a safe and effective bearing removal.
Moreover, understanding bearing types and specifications can help you select the appropriate tools and techniques for different vehicles or machinery. Using the correct bearing removal techniques can also prevent unnecessary damage to other components. Being familiar with bearing material properties can aid in choosing the right lubrication and handling methods during removal. Recognizing bearing corrosion signs can help you determine when additional measures are needed to facilitate removal and protect nearby parts.

Orion Motor Tech Rear Axle Bearing Puller Tool Kit and Slide Hammer Set, Axle Seal and Bearing Remover Set with Slide Hammer Yoke and 3 Rear Axle Puller Adapters, 1-1/4" to 2-7/8" IDs
8PC. SLIDE HAMMER SET: This 8-piece professional axle, bearing, and seal removal tool set by Orion Motor Tech…
As an affiliate, we earn on qualifying purchases.
As an affiliate, we earn on qualifying purchases.
How to Inspect Carrier Bearings Before Removal

Before removing your carrier bearing, you should check for any play by moving it gently to see if it shifts. Examine the bearing surface for signs of wear or damage, such as scoring or corrosion. Also, listen for unusual noises when rotating the bearing, as these can indicate issues needing attention. Additionally, understanding bearing load capacity can help determine if the bearing is still functioning properly. Ensuring proper alignment during inspection can prevent premature bearing failure and improve overall performance. Conducting a comprehensive inspection that includes checking for wear patterns can further identify hidden issues that may not be immediately apparent. Incorporating proper maintenance procedures can extend the lifespan of your bearings and avoid unexpected failures.
Check for Play
Wondering how to determine if your carrier bearing needs replacing? Start by checking for play. Grab the tire or driveshaft and try to move it back and forth. If you notice excessive movement or wobbling, it indicates worn bearings that require replacement. During lubrication maintenance, inspect for looseness or unusual play, as this can signal bearing wear. Remember, bearing replacement techniques should be precise; don’t ignore slight movements, as they can worsen over time. A good rule is that if there’s noticeable play or the bearing feels loose, it’s time to replace it. Always ensure you test carefully, applying steady pressure, and compare both sides for consistency. Properly checking for bearing integrity helps prevent damage during testing and ensures your carrier bearing functions safely. Additionally, inspecting for bearing wear signs regularly can help catch issues early before they lead to costly repairs. Being familiar with bearing inspection methods can further improve your diagnostic accuracy. Regular inspection techniques are essential for maintaining optimal performance and avoiding unexpected failures. Incorporating proper testing procedures can also help ensure that the bearings are functioning correctly before reassembly.
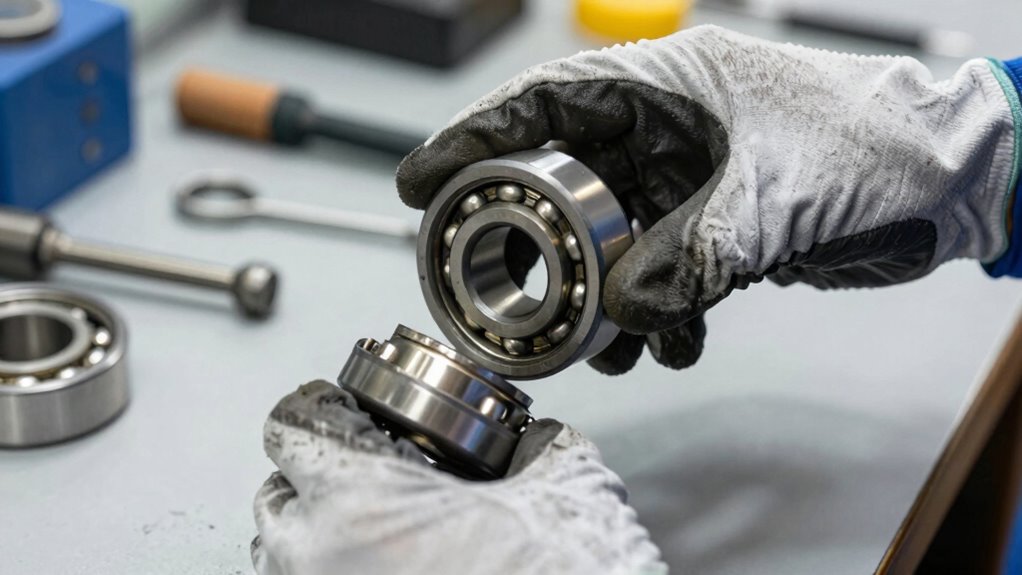
Examine Bearing Surface
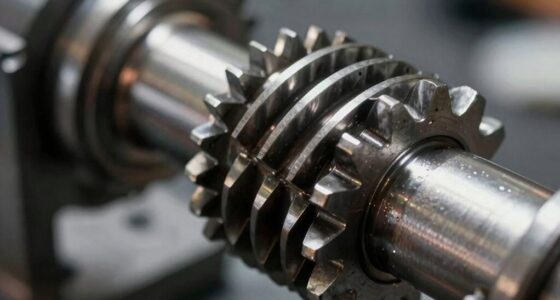
Inspecting the bearing surface carefully is essential before removing the carrier bearing. Look closely at the bearing surface for signs of wear, scoring, or pitting, which can indicate damage or deterioration. Check for surface contamination like dirt, grease, or rust, as these can affect the bearing’s performance and lead to premature failure. If you notice any debris or corrosion on the bearing surface, clean it thoroughly with a suitable solvent or inspect it more closely before proceeding. A clean, smooth surface guarantees proper fitment and reduces the risk of damaging new bearings. Remember, preserving the integrity of the bearing surface during inspection helps prevent unnecessary damage during removal and prolongs the lifespan of your replacement bearings.
Listen for Unusual Noise
How can you tell if your carrier bearing is failing? One key method is listening for unusual noise during operation. Poor bearing lubrication often causes squeaks or growls, indicating metal-to-metal contact. To diagnose noise issues:
- Listen for humming or rumbling sounds when driving straight or turning.
- Notice if noise increases with vehicle speed, signaling bearing wear.
- Check for grinding or squeaking noises during acceleration or deceleration.
- Pay attention to changes in sound when shifting from drive to reverse, which can reveal bearing instability.
- Familiarize yourself with accessibility features that can assist in vehicle inspections, especially if you have mobility challenges.
- Regular inspection of bearing condition can help catch issues early before they become more severe. Additionally, understanding maintenance intervals can help prevent bearing failure by ensuring timely repairs.
- Using diagnostic tools such as vibration analyzers can further aid in early detection of bearing problems.
- Recognizing subtle early warning signs can save you money and prevent breakdowns. These sounds are clues for noise diagnosis, helping you identify bearing problems before removal. Addressing abnormal noises early can prevent bearing failure and avoid costly damage. Always combine sound inspection with physical checks for the best results.

Kroil Original Penetrant – Rust Penetrating Lubricant – Corrosion Inhibitor Oil for Chains, Hinges & Stuck Metal Parts – Home & Industrial Use – Drip Can – 8 oz – 1 Pack (KL081)
Trusted by Professionals: Kroil Original Penetrant is a rust penetrating drip oil that tackles stuck bolts and frozen…
As an affiliate, we earn on qualifying purchases.
As an affiliate, we earn on qualifying purchases.
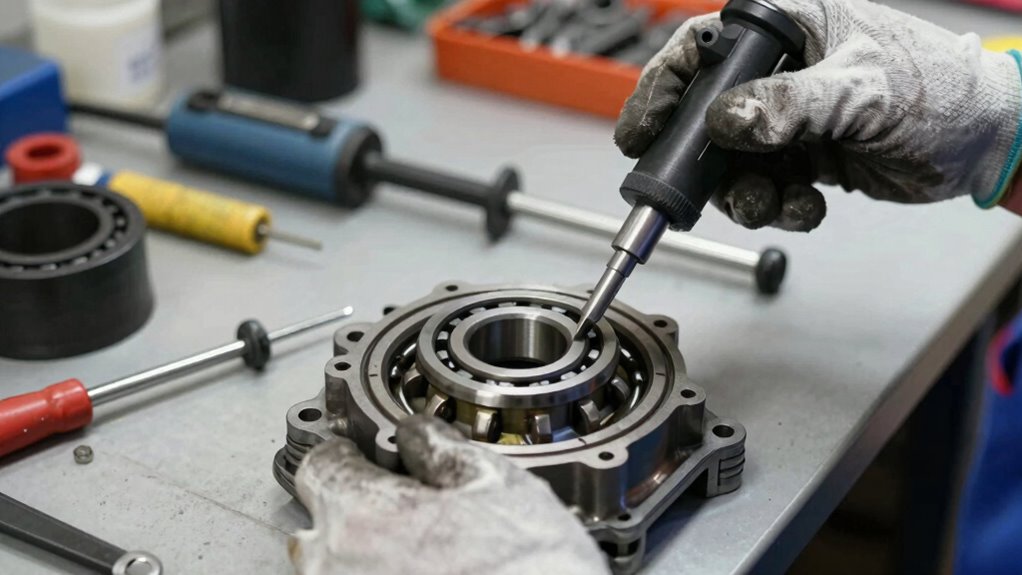
Step-by-Step: Removing Carrier Bearings Without Damage
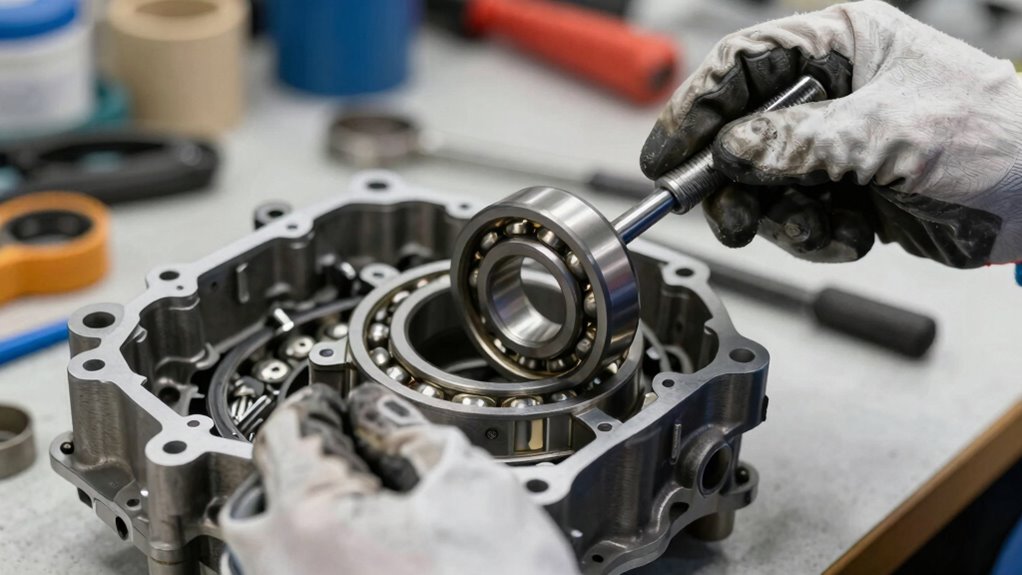
Removing carrier bearings without causing damage requires careful technique and the right tools. Begin by applying proper lubrication techniques to loosen the bearing. Use a penetrating oil around the bearing’s edges and let it sit for several minutes to reduce friction. When ready to remove, follow the bearing replacement procedures carefully: use a bearing puller suited for your application, ensuring even pressure to prevent distortion. Avoid hammering directly on the bearing or applying uneven force. Work slowly and steadily, maintaining alignment to prevent damage to the carrier or surrounding components. Take your time to ensure the bearing is fully seated on the puller before applying force. Proper lubrication and methodical removal are key to preserving the integrity of both the bearing and your axle assembly. Additionally, understanding the ethical considerations involved in proper maintenance can help ensure responsible handling and disposal of old bearings. Being aware of bearing material properties can also guide the selection of appropriate removal techniques, reducing the risk of damage during extraction. Familiarity with maintenance best practices can further improve the longevity of your bearings and prevent issues during testing. Incorporating appropriate tools designed for bearing removal can make the process safer and more effective.
Orion Motor Tech Bearing Puller Set, 5 Ton Capacity Bearing Separator, Pinion Wheel Bearing Removal Kit with 2" and 3" Jaws, Wheel Hub Axle Puller Set, Heavy Duty Bearing Splitter Tool Kit
1. VERSATILE BEARING PULLER: This Orion Motor Tech bearing puller set enables you to complete a wide range…
As an affiliate, we earn on qualifying purchases.
As an affiliate, we earn on qualifying purchases.
Common Mistakes That Ruin Carrier Bearings During Removal and Testing

One of the biggest mistakes you can make is using too much force, which can easily damage the bearing. Ignoring proper alignment during removal or testing can lead to misalignment issues and premature failure. Skipping lubrication steps might seem minor, but it can cause unnecessary wear and reduce the bearing’s lifespan.
Using Excessive Force
Applying excessive force when removing or testing carrier bearings might seem like a quick fix, but it often causes more harm than good. Overly aggressive pulling can damage the bearing surface or housing, making proper bearing installation impossible. To avoid this, remember these key points:
- Never force the bearing off; use proper tools like a bearing puller to apply even pressure.
- Ensure bearing lubrication is adequate before testing, reducing resistance and preventing unnecessary force.
- Avoid using hammers or impact tools that can distort the bearing or housing.
- Focus on gentle, controlled pressure to prevent surface damage that could compromise testing accuracy.
Ignoring Proper Alignment
Ignoring proper alignment during carrier bearing removal and testing can lead to immediate damage or future failures. When you neglect to align the bearing correctly, you risk uneven wear and increased stress on the component. Proper lubrication is essential during reinstallation to ensure smooth operation, but without correct alignment, lubrication alone won’t prevent damage. Misaligned bearings can cause premature bearing replacement, which wastes time and money. Always double-check alignment before pulling or testing the bearing. Proper alignment ensures the bearing seats correctly, reducing the chance of deformation or cracks. Skipping this step can lead to bearing failure even if lubrication is adequate. Take the time to align properly, as it’s a critical factor in preserving the integrity of the bearing and avoiding costly repairs down the road.
Skipping Lubrication Steps
Skipping lubrication steps during carrier bearing removal and testing can severely damage the component. Proper lubrication is essential because it reduces friction, prevents corrosion, and extends bearing lifespan. Neglecting this step can lead to premature wear or failure. To avoid costly mistakes, focus on these key points:
- Always apply the recommended lubricant before testing or reinstalling.
- Use proper lubrication to ensure smooth movement and prevent overheating.
- Skipping lubrication can cause metal-on-metal contact, shortening bearing lifespan.
- Regular lubrication maintenance preserves bearing integrity during testing and operation.
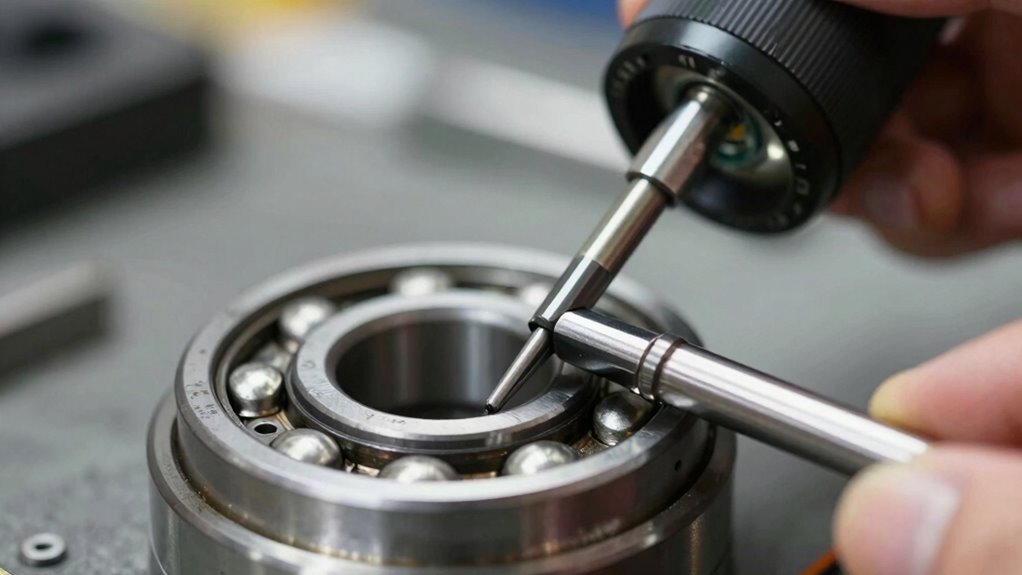
How to Test Carrier Bearings Safely After Removal
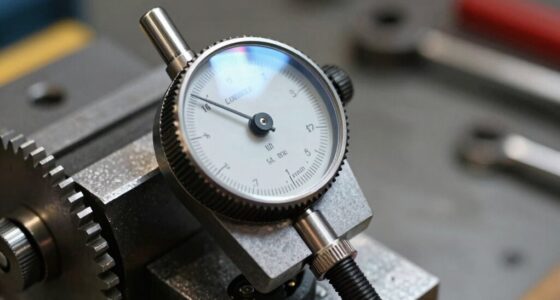
Once you’ve removed the carrier bearing, it’s essential to test it safely before reinstalling or replacing it. To do this, gently rotate the bearing by hand, feeling for smoothness or roughness. Use proper lubrication techniques to guarantee accurate testing; apply a light film of suitable lubricant if needed, avoiding excess that could skew results. Check bearing compatibility by comparing it to new or known good bearings, ensuring dimensions and fit are correct. Visualize the process with this table:
| Step | Action | Purpose |
|---|---|---|
| Rotate bearing | Spin by hand gently | Detect roughness or noise |
| Lubricate | Apply light lubrication if needed | Ensure smooth operation |
| Compare sizes | Measure with calipers or gauges | Confirm bearing compatibility |
This approach guarantees a safe, accurate assessment without risking damage.
How to Identify Damage or Wear in Carrier Bearings
To identify damage or wear in carrier bearings, you should closely inspect their surface for signs of deterioration. Look for uneven wear, scoring, or pitting that indicates excessive friction or contamination. Check for these key indicators:
- Uneven or shiny spots, which suggest insufficient lubrication techniques during bearing installation.
- Cracks or fractures in the bearing material, signaling fatigue or overloading.
- Corrosion or rust, often caused by moisture exposure or poor maintenance.
- Excessive play or looseness, indicating bearing wear or improper installation.
Pay attention to the bearing’s condition during testing, and always guarantee proper lubrication techniques are used to prevent premature damage. Correct bearing installation is crucial for accurate assessment and longevity.
Tips for Applying Correct Pressure During Carrier Bearing Removal

Applying the correct pressure during carrier bearing removal is essential to prevent damage to the bearing or surrounding components. To do this, ensure the bearing is properly lubricated with fresh bearing lubrication before removal. This reduces friction and minimizes the risk of damaging the bearing surface. Use the appropriate tools, such as a bearing puller or press, applying steady, even pressure. Avoid excessive force, which can distort or damage the bearing or housing. If you’re planning bearing replacement, gentle pressure helps preserve the integrity of the new bearing during installation. Always follow manufacturer guidelines for removal and installation, and double-check that the bearing is lubricated properly. Applying correct pressure ensures a smooth removal process and helps maintain the bearing’s condition for reliable operation.
Troubleshooting: What to Do If Your Carrier Bearings Are Damaged

When you notice symptoms like unusual vibrations, noises, or uneven tire wear after removing your carrier bearing, it’s a sign that the bearing may be damaged. To troubleshoot, start by:
- Inspecting the bearing for visible damage or wear marks.
- Checking if bearing lubrication was properly applied during installation—lack of lubrication causes early failure.
- Confirming the bearing was installed correctly, ensuring proper fit and alignment.
- Deciding if a carrier bearing replacement is necessary to restore smooth operation.
If damage is confirmed, replace the bearing promptly to prevent further issues. Always ensure proper bearing lubrication during installation, and avoid reusing damaged parts. Proper troubleshooting saves time and prevents costly repairs down the road.
Frequently Asked Questions
Can Carrier Bearings Be Reused After Removal if Undamaged?
Yes, if the carrier bearing shows no signs of damage during inspection, you can consider reusing it. Carefully inspect the bearing for wear, cracks, or corrosion, and assess its condition thoroughly. Reuse considerations include ensuring the bearing still maintains proper fit and function. Keep in mind that even undamaged bearings should be checked for proper lubrication and smooth rotation before reinstalling to prevent future issues.
What Are the Signs of Internal Damage in Carrier Bearings?
You can spot internal damage in carrier bearings through bearing inspection, looking for symptoms like uneven rotation, roughness, or noise during spin testing. Damage symptoms also include visible wear, scoring, or discoloration on the bearing surface. If you notice any of these signs, it indicates internal damage, and the bearing may need replacement. Regular inspection helps prevent failure and ensures smooth operation of the drive system.
How Long Does the Removal and Testing Process Typically Take?
Time is of the essence, so don’t delay. Typically, bearing removal and testing procedures take about 1 to 3 hours, depending on your experience and equipment. You’ll carefully extract the bearing, then perform thorough testing to assess its condition. Remember, patience is key—rushing can cause damage. By following proper steps, you ensure the process goes smoothly and your bearings stay protected, just like a well-oiled machine working seamlessly.
Are Specialized Tools Necessary for Different Vehicle Makes?
You’ll need specialized tools for different vehicle makes to guarantee proper carrier bearing removal and testing. These tools are designed for specific vehicle compatibility, preventing damage and making the process smoother. Using the right equipment helps you avoid ruining bearings and ensures a secure fit during reinstallation. Always check your vehicle’s make and model before selecting tools, and follow manufacturer guidelines to achieve the best results without causing unnecessary harm.
What Safety Precautions Should Be Taken During Bearing Removal and Testing?
To stay safe during bearing removal and testing, always wear personal protective gear like gloves and safety glasses. Make certain your workspace has proper ventilation to avoid inhaling dust or fumes. Keep your work area organized to prevent accidents, and follow manufacturer instructions carefully. Use the right tools to avoid damaging bearings, and stay alert to potential hazards throughout the process. Prioritizing safety helps prevent injuries and equipment damage.
Conclusion
Careful removal saves your bearings from destruction, just like gentle hands prevent scars. Rushing or using the wrong tools can turn a simple test into costly damage. Think of it this way: precision during removal is your best insurance against premature failure. Stay patient, follow the steps, and your carrier bearings will thank you with longer service. After all, a smooth process today means a smoother ride tomorrow.