Set up an automotive garage where hand tools, fluids, parts, and safety gear are easy to find and safe to store. This guide is for home mechanics who have basic hand tools and want a practical system without buying storage they do not need. Allow 4-8 hours, plus extra time if you need to install wall-mounted storage or move heavy equipment.

Get business pricing on garage and car supplies
- Business-only prices and quantity discounts
- Tax-exempt purchasing
- Multiple users, one account, clear invoices

POKIPO Large Power Tool Organizer Wall Mount with Charging Station – 4-Layer Heavy-Duty Metal Rack
- ✔ Listed load capacity: 600 lb
- ✔ Shelves: 4 tiers
- ✔ Drill storage: 8 slots

OEMTOOLS 26052 4-Pc Collapsible Magnetic Tray Set 4-1/2" for Small Parts
- ✔ Set size: 4 trays
- ✔ Expanded dimensions: 4.5 in square, 2 in deep
- ✔ Folded height: 0.75 in

Power Tool Organizer Wall Mount, 4-Tier Heavy-Duty Tool Storage Rack
- ✔ Listed shelf capacity: 400 lb
- ✔ Shelves: 4 tiers
- ✔ Material: Alloy steel
Difficulty: Beginner | Time: 4-8 hours
What You’ll Need
Tools & Materials:
- Tape measure
- Marker and labels
- Heavy-duty shelving rated for the loads you plan to store
- Tool chest, cabinet, or rolling cart
- Pegboard, slatwall, or wall-mounted rail system with compatible hooks
- Small-parts organizers with lids
- Bins for sorting and disposal
- Cleaning cloths and broom
- Wall anchors and a drill, if installing wall storage
Knowledge:
- Basic ability to sort tools and identify common automotive supplies
- Ability to read storage product load ratings and assembly instructions
- Basic awareness of safe handling and storage requirements for automotive fluids
Check the garage floor, walls, and available clearance before buying storage. Follow product instructions and local rules for storing fuel, oil, batteries, and other hazardous materials. Keep chemicals away from heat, ignition sources, drains, children, and pets. Arrange proper disposal for unwanted fluids, batteries, and chemicals; do not pour them down a drain.
POKIPO Large Power Tool Organizer Wall Mount with Charging Station – 4-Layer Heavy-Duty Metal Rack
For a garage where drills, batteries, and hand tools compete for bench space, the POKIPO is the most comprehensive organizer in this lineup. Its four tiers, eight drill slots, bit racks, and hooks bring several tool categories together, while the integrated four-outlet strip gives chargers a place beside the tools they serve. Compared with the other steel wall rack, it lists a higher 600-pound capacity and adds charging, so it makes more sense when the goal is a central, frequently used tool station.That completeness comes with a footprint and installation commitment. The rack needs substantial wall area, and mounting requires drilling into a suitable surface; buyers should confirm the wall and anchors are appropriate for the load they plan to store. The listed mounting options include wood, concrete, and pegboards, but the quality of the mounting surface still matters. Unlike the OEMTOOLS trays, this is not a portable way to organize parts during a repair, and its indoor-use designation makes it a poor fit for exposed outdoor storage. Choose it when power-tool access and charging belong together; skip it if a compact, movable organizer is the real need.
Pros:
- Four tiers combine shelves, hooks, bit racks, and eight drill slots.
- Integrated four-outlet power strip and 6.5-foot cord support charging at the rack.
- Listed 600-pound capacity exceeds the other wall rack’s stated capacity.
- Powder-coated metal construction is intended for heavy indoor tool storage.
Cons:
- Bulky footprint can overwhelm a compact garage wall.
- Requires drilling and secure installation; mounting hardware does not eliminate the need to assess the wall.
- Specified for indoor use, limiting placement in exposed outdoor areas.
Best for: Garage owners building a permanent wall station for drills, chargers, hand tools, and accessories.
Not ideal for: People with limited wall space, renters who cannot drill, or anyone needing a portable fastener-sorting setup.
Bottom line: We recommend the POKIPO for a dedicated automotive tool wall where combined storage and charging matter more than compactness.
“We recommend the POKIPO for a dedicated automotive tool wall where combined storage and charging matter more than compactness.”
OEMTOOLS 26052 4-Pc Collapsible Magnetic Tray Set 4-1/2" for Small Parts
Automotive work generates a steady stream of nuts, bolts, clips, and other small pieces that are easy to misplace on a crowded bench. The OEMTOOLS set gives those parts their own color-coded landing zones: four square trays expand to two inches deep, and magnetic bases help keep them in place on compatible metal surfaces. That makes the set useful beside a vehicle or workbench, where sorting parts as they come off can make reassembly less chaotic.Its advantage over either wall rack is portability and compact storage, not overall capacity. The trays fold to three-quarters of an inch tall, so they can be tucked away when the job ends; the POKIPO and steel rack instead keep larger tools visible and ready on the wall. Each tray is limited to two pounds, and four trays may not be enough when a complex repair calls for many separate groups. These trays also do not organize drills, chargers, or bulky automotive tools. Pick them as a focused companion for fasteners and small components, not as a stand-alone garage storage system.
Pros:
- Four collapsible trays fold flat for compact storage.
- Magnetic bases help keep trays and small steel parts in place on suitable metal surfaces.
- Distinct colors make separate groups of fasteners easier to identify.
- Two-inch expanded depth provides a contained space for small repair parts.
Cons:
- Two-pound capacity per tray limits use for larger components or high-volume sorting.
- Four trays may not provide enough categories for complex repairs.
- Does not replace a rack for drills, hand tools, or garage equipment.
Best for: DIY mechanics and technicians who want to separate small fasteners while working and store the trays flat afterward.
Not ideal for: Buyers seeking heavy-tool storage, a fixed wall organizer, or more than four sorting zones for a single job.
Bottom line: We would choose the OEMTOOLS set to control loose repair parts, especially when a permanent wall installation is unnecessary.
“We would choose the OEMTOOLS set to control loose repair parts, especially when a permanent wall installation is unnecessary.”
Power Tool Organizer Wall Mount, 4-Tier Heavy-Duty Tool Storage Rack
This four-tier rack suits garages where the tool mix changes and adjustable storage matters. Its modular pegboards and adjustable hooks let buyers arrange hanging space around the tools and accessories they own, while four shelves provide a place for items that do not fit a drill slot. Compared with the POKIPO, it emphasizes customizable hanging storage instead of a built-in power strip, and its stated 400-pound capacity is lower than the POKIPO’s 600-pound figure.The rack is described as quick to assemble with mounting hardware included, but that should not be confused with a no-effort wall installation: the full stated capacity depends on secure anchoring to wall studs, and uneven or non-standard walls can complicate fitting. Its corrosion- and rust-resistant descriptions may be useful in a working garage, but the product is still specified for indoor use. Unlike the OEMTOOLS trays, it is a fixed home for larger tools rather than a movable place to collect fasteners. We would shortlist it when adjustable hooks and pegboard organization take priority; choose POKIPO when charging and the higher listed capacity better match the work area.
Pros:
- Four tiers combine shelves with modular pegboard storage.
- Adjustable hooks allow the layout to adapt to different tools.
- Listed capacity is 400 pounds, with a steel frame and reinforced crossbars.
- Described as corrosion resistant, rust resistant, and scratch resistant for indoor use.
Cons:
- Its stated capacity is lower than the POKIPO rack’s 600-pound rating.
- No integrated power strip is listed for charging tools at the rack.
- Secure stud anchoring and uneven walls can make installation more involved.
Best for: Garage owners who want wall-mounted shelves and adjustable hanging positions for a changing tool collection.
Not ideal for: Anyone who needs integrated charging, a portable organizer, or a rack for walls that cannot be anchored securely.
Bottom line: We recommend this rack when adjustable hanging storage is more useful than integrated charging or the lineup’s highest stated load capacity.
“We recommend this rack when adjustable hanging storage is more useful than integrated charging or the lineup’s highest stated load capacity.”
As an Amazon Associate we earn from qualifying purchases.
Before You Start
Park vehicles outside while you work and leave a clear path to the garage exit. Take a quick inventory of tools and supplies before shopping. Measure wall space, ceiling height, door swing, and the area needed to open vehicle doors. Mark where the car, workbench, floor jack, and other large equipment need to remain accessible. Do not mount shelves or cabinets until you know what they will hold and can confirm the wall supports the load.
Step-by-Step Instructions
Step 1: Clear the work area
Move tools, parts, boxes, and equipment into a temporary sorting area. Sweep the floor and check for leaks, damaged outlets, loose wall panels, or other problems that could affect storage placement. Keep exits and access to fire extinguishers, electrical shutoffs, and first-aid supplies clear.
Tip: Do not lift heavy equipment alone. Use an appropriate dolly or ask for help, and keep loads low while moving them.
Check: You can see the floor and walls where storage will go, and the garage exit and emergency equipment remain accessible.
Step 2: Sort tools and supplies
Sort tools and supplies into separate groups: hand tools, power tools, diagnostic equipment, fasteners, replacement parts, fluids, cleaning products, and safety gear. Remove duplicates you do not need, and set broken, unidentified, or expired items aside for repair or proper disposal. Keep vehicle-specific parts together and label them with the vehicle make, model, or project.
Tip: Do not combine chemicals just because they come in similar containers. Keep products in their original labeled containers and follow their storage instructions.
Check: Every item is assigned to a useful group, and items for disposal or repair are no longer mixed with ready-to-use supplies.
Step 3: Measure and map storage zones
Measure the available wall and floor space, then sketch a simple layout. Place frequently used hand tools near the main workbench. Reserve a stable, low area for heavy items, and plan separate storage for fluids and chemicals. Leave enough room to roll carts, open drawers, walk around a vehicle, and use a floor jack and jack stands.
Tip: Keep tools and shelves clear of vehicle doors, lights, electrical panels, and any equipment that needs ventilation.
Check: Your layout shows where each storage type will sit and includes clear paths through the garage.
Step 4: Choose storage for each group
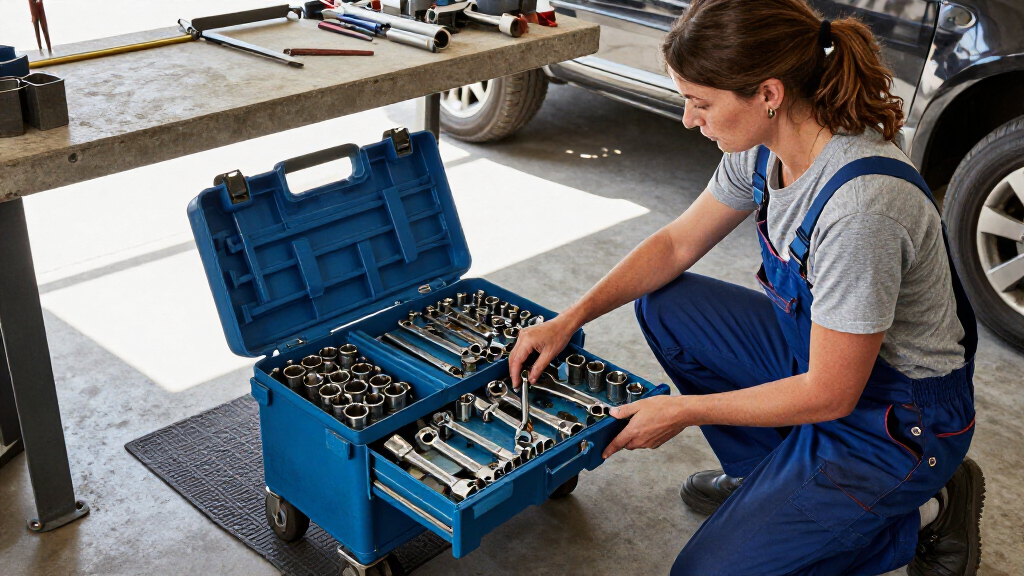
Assign each group a storage type suited to its size, weight, frequency of use, and need for protection. Use a lockable tool chest or cabinet for valuable hand tools and diagnostic equipment. Use a rolling cart for tools needed at the vehicle. Store sockets, clips, fuses, and fasteners in lidded organizers with clear labels. Choose sturdy shelving for boxed parts and supplies, and use wall-mounted rails or pegboard for tools that you reach for often.
Tip: Check each shelf, cabinet, hook, and organizer’s load rating. A wall system is only as strong as its anchors and the wall behind it.
Check: Each group has a storage type suited to its size, weight, frequency of use, and need for protection.
Step 5: Install and secure storage
Assemble cabinets and shelves according to their instructions, then secure them as directed. Locate suitable wall framing or masonry before fastening wall storage; use anchors rated for the wall material and expected load. Put heavy items on low shelves and keep chemicals in a stable, designated area. Do not stack heavy bins where they could fall onto a person or vehicle.
Tip: If you cannot confirm that a wall or fastener can carry the load, use freestanding storage or get help from a qualified installer.
Check: Storage stands level, does not wobble, and is secured as specified by its manufacturer.
Step 6: Put tools away by frequency and risk
Place daily-use tools within easy reach of the workbench or cart. Put specialty tools and less-used equipment in labeled drawers or bins. Keep sharp tools protected, electrical equipment dry, and chemicals in their designated storage area. Store heavy equipment low enough to lift without reaching overhead, and keep emergency supplies visible and reachable.
Tip: Keep clear space around the vehicle’s working area; hooks and bins should not project into a path where you could bump into them.
Check: Common tools are easy to reach, heavy objects are stored low, and safety equipment is not blocked.
Step 7: Label drawers, bins, and shelves
Label each organizer with a specific category, such as metric sockets, electrical connectors, or brake service tools. Add vehicle or project details to bins containing dedicated parts. Use labels you can read from the normal standing position, and mark any items that require special handling.
Tip: Avoid labels that are too broad, such as “miscellaneous.” Split mixed contents into clear categories so items can be returned to the right place.
Check: You can locate a typical item by reading the labels without opening several unrelated containers.
Step 8: Test the setup and adjust
Walk through a typical job, such as checking a battery or changing a wheel, and gather the tools you would use. Move any storage that blocks a vehicle door, work path, or equipment. Return each item to its labeled place, then make a short list of missing organizers or labels before buying anything else.
Tip: Repeat this check with the vehicle parked in its usual position; an empty garage can hide clearance problems.
Check: You can reach the needed tools, move around the vehicle, and put everything back without blocking walkways or equipment.
Common Mistakes to Avoid
- Buying cabinets and organizers before measuring the garage or sorting supplies. — Inventory first, measure the actual space, and choose storage to fit the items you own.
- Mounting heavy storage with unsuitable fasteners or placing heavy loads overhead. — Follow load ratings and installation instructions, use fasteners suited to the wall, and store heavy items low.
- Keeping fluids in unmarked containers or storing chemicals beside heat sources. — Use original labeled containers, follow product directions, and keep hazardous materials in an appropriate, stable area away from heat and ignition sources.
- Filling every wall and floor area with storage. — Preserve walking paths, vehicle clearance, access to emergency equipment, and room to handle tools safely.
Troubleshooting
Problem: Wall hooks or shelves loosen after installation.
Solution: Remove the load, inspect the fasteners and wall material, then reinstall using the manufacturer’s directions and suitable anchors. Use freestanding storage if the wall cannot safely carry the load.
Problem: Small fasteners and parts keep ending up in the wrong bins.
Solution: Use organizers with separate compartments, label each category clearly, and return parts to their assigned compartment immediately after a job.
Problem: The garage still feels crowded after storage is installed.
Solution: Check whether unused parts, duplicate tools, or empty packaging are taking up space. Remove items you do not need and reposition storage that blocks the vehicle or work path.
Problem: You cannot find a tool during a job.
Solution: Add it to a clearly labeled category near the workbench or cart. After the job, update the label or layout if the current location does not match how often you use it.
What Success Looks Like
The garage is organized when you can park and move around the vehicle, reach frequently used tools without searching through unrelated containers, and return supplies to clearly labeled locations. Shelves and wall storage remain stable under their intended loads, heavy items sit low, hazardous materials follow their product storage directions, and exits and emergency equipment stay clear. Test the arrangement by completing a routine maintenance task and putting every item back afterward.
Next Steps
After your first job, move tools that were awkward to reach and revise labels that did not help. Spend a few minutes after each project returning tools and removing empty packaging. Check shelves, anchors, and fluid containers periodically, and update vehicle-specific bins when a project ends. Take unwanted fluids, batteries, and chemicals to an approved collection point.
Frequently Asked Questions
What should I organize first in an automotive garage?
Start with tools and supplies you use most often, then handle heavy equipment, chemicals, and vehicle-specific parts. This lets you set useful storage priorities before buying organizers.
Should I use pegboard or a tool chest?
Use a tool chest for protected, secure storage of hand tools and diagnostic equipment. Use pegboard or a compatible rail system for frequently used tools you want to see and grab quickly. Many garages benefit from both.
Where should I store automotive fluids?
Keep fluids in their original labeled containers and follow each product’s storage directions and local requirements. Use a stable designated area away from heat, ignition sources, drains, children, and pets. Dispose of unwanted fluids through an approved collection service.
How can I keep small parts from getting mixed up?
Use compartment organizers with lids and label each compartment by part type, size, or vehicle. Keep project-specific parts in a separate labeled bin until the work is complete.
How often should I reorganize my garage?
Return tools after every job and review the layout whenever you add equipment or start a new type of project. Check storage stability and chemical containers periodically, and revise the setup if it blocks vehicle access or slows down routine work.